
What you need:
- 1 ½ Cups warm water (about 110 degrees)
- 3-3 ½ Cups bread flour (if you don't have it, all-purpose is fine)
- 4 tsp. Yeast
- 2 Tbsp. Honey
- 1 tsp. Salt (I use onion salt for more flavor)
- 1 Egg
- 8 Olives
- 2 Tbsp. Minced garlic
- Baking sheet
- Parchment paper
Putting it Together:
- Take the olives and mince them. This takes a bit of time, but the easiest way I found, was to cut the olive in half, cut that into very thin slices and then mince. Then repeat

- Set your bread machine to the "Mix Dough" setting and then add the yeast, water, and honey. Let proof for about 5 minutes
- Add 1 cup of flour and then the salt, olives, minced garlic, and egg
- Start the machine and add the remaining flour ½ cup at a time. Let the machine incorporate the flour before adding more. Once all flour is added, make sure the dough is not too wet or dry (add flour or extra water as needed)
- Once the dough cycle is complete (about 1 hour 40 minutes), remove dough and gently roll into a ball

After rising...

- OR remove dough from machine after it is finished kneading- about 20 minutes- and place in a large, oiled, bowl. Cover with oiled plastic wrap and place in a warm area until doubled- about 1 hour), then remove dough, divide into two pieces, and gently roll each into a ball
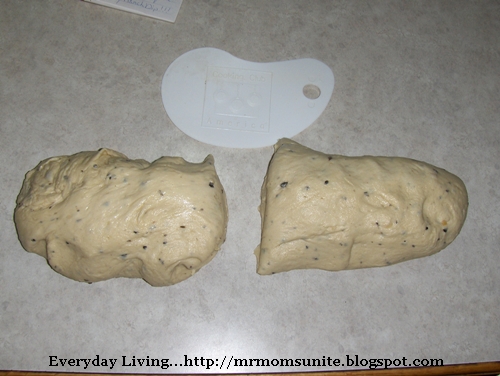
Photo of dough rolled into balls before their 10 minute rest...

- Let rest for ten minutes
- Take the first ball and roll into a roughly 9 x 16 rectangle. The measurements do not need to be precise, they are just to give you a general idea as to the shape and depth of your dough

- Starting from the bottom, tightly roll your dough (jelly-roll style) into a log


- Fold the ends under and crimp
- Turn bread over and crimp all the seams to seal. If ALL of the edges are not sealed, then it will undo itself during the rising and baking
- Transfer to parchment-lined baking sheet and place seam side down
- Repeat with second piece of dough

- Cover with oiled plastic wrap and let rise in warm place for 30 minutes
- After rising, preheat oven to 400°
- Bake for 15 minutes, turning the sheet 180° halfway through
- When finished, the bread should be nicely browned and have a hollow sound when thumped

- Let cool for at least 30 minutes before enjoying


not only does that sound good it looks delicious
ReplyDeleteAnn: Thanks! This is turning out to be one of my favorites :)
ReplyDelete