For those of us who use Blogger, they have made it very simple to add these Breaks. Using the "New Post Editor", place your cursor at the desired location and click the "broken page" symbol (see photo).
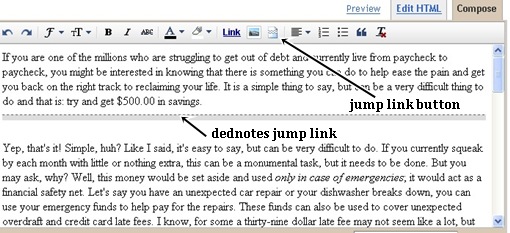
If you decide that you would like to move the Break to a different location, you can just drag and drop it. To view it, go to the main page of your site and scroll down to the post and it should be visible (if you go to the individual post page, it will not be visible. Yep, I did this).
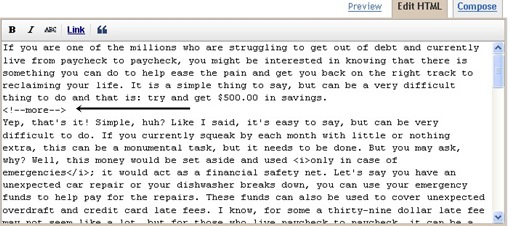
If you do not use the New Editor and would like to use HTML, just click the "Edit HTML" button and enter the following code at the point you want the Break...
<!-- more -->See photo, below:
Now, on the chance that you are using a template you got from somewhere else and you don't see the Jump Break, you may have to enter some additional code. If you can take a look at the picture below, you will notice a portion of code that is enclosed in a box. You will need to go to the Layout section of your dashboard and click the "Edit HTML" button. Check the "Expand Widget Templates" box and page down to where you see the code indicated by the arrow (see photo below).
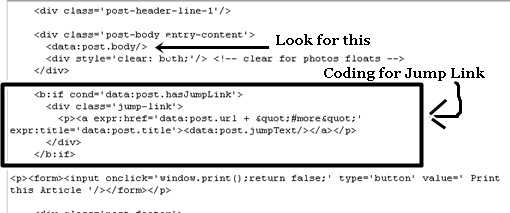
You will then need to copy the code below and place it where indicated by the box.
<b:if cond='data:post.hasJumpLink'>
   <div class='jump-link'>
      <a expr:href='data:post.url + "#more"
' expr:title='data:post.title'>
<data:post.jumpText/></a>
      </div>
    </b:if>
You will notice that in the code seen in the picture I have added a <p></p> tag. This is just to put a little space between the body of the post and the actual Jump Break.
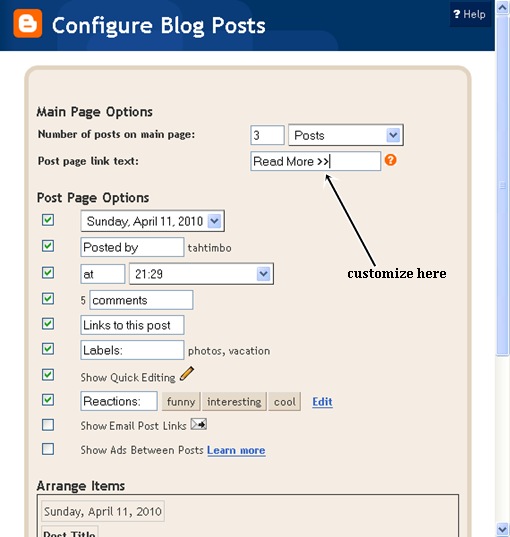
Finally, if you would like to have your link read something other than "read more," than you can customize that as well. First, go back to the Layout page on your dashboard and click "Page Elements". Next, click the "edit" button under "Blog Posts" (see photo below).
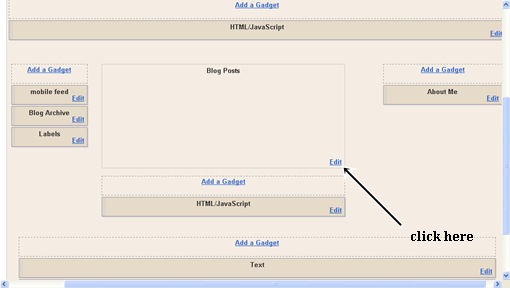
Next, go to the area denoted by the arrow below and have fun.
source: goggle support


I wish I knew how to figure this kind of stuff out, but then again I guess I don't need to because you keep making it all so easy for us. Thanks for the info
ReplyDeleteThis is a very helpful post! I didn't even know we could do that jump break in Blogger. Maybe I should try it now that I'm writing some longer posts. I don't really like it though when I come across that on other blogs. I tend to like knowing how long a post is before I read it.
ReplyDeleteAnn: I just came across this stuff a few days ago. Glad you liked it.
ReplyDeleteKaren & Gerard Zemek: I'm with you, I won't use it on my most recent post, but I did add it to some of my older ones.
This is great! I have been wondering if I should use this or not - wasn't even sure how. I think it's a good idea to use on the older posts that load on the page. Thanks!
ReplyDeleteCinnamon-Girl: You're very welcome. If you come across any difficulties, please let me know and I'll try to help.
ReplyDeleteHave a great weekend!!