13 June 2012

Adding Pinterest Pin Buttons to your Images in Blogger

This is something I just came across today, so I figured I would share this with you. If you are a member of Pinterest, then you know about pinning images from other sites and about using the "Pin It" button on your web browser. But, what about being able to have other people "Pin" images from your site? Well, they can still use the "Pin It" button, but to make it even easier for them, why not place a button right below the image you want them to Pin?

Well, this is what I will try and explain today. First, you will need to login to your Pinterest account and then Click "Pin It Button" under the "about" tab on the upper right of your profile page. Scroll down until you get to the section titles, "Pin It Button for Web Sites." Also, you can just follow the link here to the Pinterest Goodie Page
Here's a screenshot of what you will see. Your URL areas will be blank, I just let you see what I was working on to give you an idea of what it will look like when complete...
Photo of Pinterest dashboard
  • First, go to the actual page that your image appears and copy the url
  • At Pinterest, at the top of the section, you will see, "URL of the page the pin is on:". Paste the url here
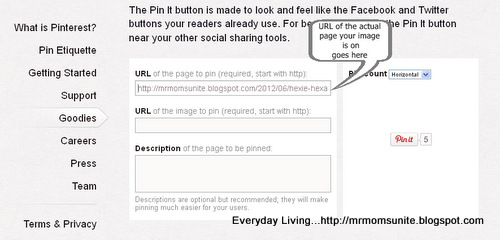
photo of code for page url
  • In your Blogger editor, click on the HTML button and come down to where your image appears. Copy the URL address of that image
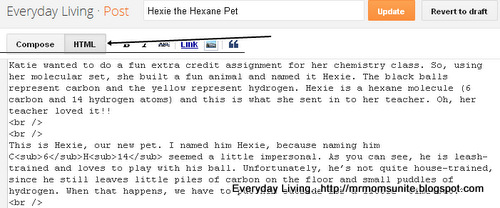
photo of location of HTML button

Here is what your image/photo URL will look like...
photo of location of HTML button
  • At Pinterest, come down to where it says, "URL of the image to be pinned:". Paste the image URL here
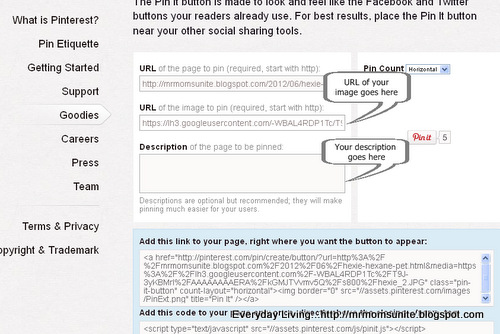
photo of image url
  • Provide a description of your photo. This is what will appear in the Pinterest "Pin It" window when it opens
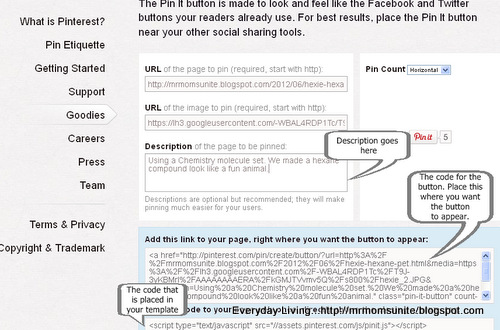
photo of all codes
  • Find, "Add this code to your page, right where you want the button to appear:". While still in HTML mode, copy the code that appears and place it below your photo.
  • You might also want to be sure that you place the code before the closing CENTER tag, so it looks good
Here is what the code will look like when placed under your photo... photo of what code will look like when completed
  • Finally, at the bottom of the section, where you see "Add this code to your page only once, directly above the closing tag:" you will need to copy the javascript and place it in your template just above the tag
If you are unsure, I have included a few photos on how to get to your template. Also, be sure to SAVE your template before making any changes...

photo of button to click to get into template

second photo of getting into Blogger template


After you place the code and save, go back to your Blogger editor and click "Preview" to see that everything looks good.

No comments:

Post a Comment

Related Posts Plugin for WordPress, Blogger...

Google Analytics