Showing posts with label recipes. Show all posts

05 June 2012

Ginger Chicken and Sausage with Brown Rice, Vegetables, and Spinach

Here's a great recipe to use if you are trying to find something healthy (especially if you omit the sausage) AND filling to eat for dinner. Please don't let the number of ingredients put you off, because although it does take a little over an hour to prepare, it is very easy to do. For just two people, this recipe will make meals for just over a week (depending on portion size). In other words, this recipe makes A LOT!!

Also, you can add just about anything to this recipe that you want. I have used pork instead of chicken and it tastes just as good. Feel free to experiment. This recipe is a great base from which to play around with different combinations of veggies and meats. Oh, it also goes great with Naan bread (an Indian bread). This is a flat bread, you can use it as a spoon to scoop the rice mixture. Very tasty!!

photo of chicken with sausage,brown rice, vegetables, and spinach

What you need:

04 June 2012

Naan Bread (Indian Flat Bread) Recipe

Here is a recipe for Naan bread that I found. I originally found this recipe at budgetbytes and I would encourage you to visit her site and take a look around. She has also broken-down the recipe and given a price list for each item, which is great if you're on a budget.


photo of Naan bread


There are many recipes out there for this bread, but this is the one that I have used several times, with great results. It is very easy to make and makes a great compliment to curry and rice dishes. It's also just fun to snack on :)


What you need:

  • 2 tsp. Yeast
  • ½ Cup warm water (about 110 degrees)
  • 2 ½- 3 Cups flour
  • 1 tsp. Sugar
  • ¼ Cup olive oil
  • 1/3 Cup plain Greek yogurt (if you don't have this, try using sour cream. Sour cream is not as "tangy" as the Greek yogurt, but it won't affect the overall taste.)
  • 1 large egg
  • ½ tsp. Salt
  • 1 Tbsp. Ground flax seed (optional) (high in fiber and has many health benefits)
  • Olive oil...for heating the bread (If not using cast iron pan)
  • Brown paper bag...for storage of bread

Putting it Together:

  • Set your bread machine to the "Mix Dough" setting and then add the sugar, water, and yeast. Let proof for about 5 minutes. It will be nice and foamy
  • Add 1 ½ cups of flour and then olive oil, salt, ground flax seed (optional), olive oil, yogurt, and the egg
  • Start the machine and add the remaining flour ½ cup at a time. Let the machine incorporate the flour before adding more. Once all flour is added, make sure the dough is not too wet or dry (add flour or extra water as needed)
  • Once the dough cycle is complete (about 1 hour 40 minutes), remove dough and gently roll into a ball
    • OR remove dough from machine after it is finished kneading- about 20 minutes- and place in a large, oiled, bowl. Cover with oiled plastic wrap and place in a warm area until doubled- about 1 hour), then remove dough and gently roll into a ball
  • Cut the ball into 8 equal parts and roll each of those into individual balls

Here's a photo of a few of the bread balls. They look bigger than they actually are..
photo of bread balls

  • Let rest for 10 minutes
  • Heat a large skillet (I used cast-iron) to medium heat
  • Working one at a time, take one dough ball and flatten it into roughly a 1/4" thick, 6" circle. If you're like me, your circles will leave much to be desired, so try and make a very thin polygon :). You will want to have lots of bubbles in your dough when you heat it, so the thinner the dough, the better
  • Add small amount of oil to skillet (if not using cast iron)
  • Add flattened dough and cook until bubbles form and bottom is brown (about 65 seconds). The first one will probably take longer to cook, but it's good to check at the 65 second mark. You are looking for the bubbles to be a golden brown. This means it is done

photo of Naan bread cooking

  • Flip bread and cook for an additional 65 seconds

photo of Naan bread cooking

  • Place cooked bread in brown paper bag and close top. this will help keep your bread moist
  • Repeat with remaining dough
Enjoy!

17 March 2012

Pillsbury Bake-Off and Walmart $25 Gift Card Giveaway


Contest is now closed.


Congratulations, Stephanie!!


I will be contacting you for your mailing information. I want to take this time to thank all of you who have participated and I hope that you will come back again for the next giveaway.


photo of Pillsbury logo If you are anything like me, you're always on the lookout for something new to serve your family. I don't want my family to get bored with the same old fare, so I like to add new things from time to time. Luckily, there is a great source for ideas at Bake-off.com. They have just added 100 new recipes to their coffers from Pillsbury Bake-Off finalists. Since these recipes are from the finalists, you know they have to be good. Whether you are looking for new ideas to serve at dinner or if you want to impress your relatives with a special dessert at your next family gathering, Bake-Off.com has you covered. From breakfasts to brunches and appetizers to dinners, you can find some great ideas to WOW your family.

To get started, just look through some of the following recipes or go to BakeOff.com and look around at the many easy and delicious recipes they have there. Next, once you've found what you're looking for, take a moment and check EverydaySaver to see if they have any additional coupons or offers available. Once you're good to go, head on over to your local Walmart, where you can find great savings on refrigerated Pillsbury products including: Pillsbury Original Crescent Rolls, Pillsbury Cinnamon Rolls, Pillsbury Pie Crust, and Pillsbury Cookies among other items.


To get the ball rolling, here's just a few of the delicious recipes they have over at BakeOff.com:
  • Chocolate and Caramel-Cinnamon Roll Skewers - Instead of just settling for ordinary cinnamon rolls, why not add a little spark to them by skewering them and then drizzling them with caramel, chocolate and icing. Sound tempting? Guess what, the prep time for this innovative treat is only 30 Min!!

  • Marmalade-Glazed Asian Meatball Cups - Here's a meatball with attitude! This meatball is baked on top of flaky crescent dough. There's just 6 ingredients and the prep time is only 20 Min! 

  • Mango Salsa Appetizer Bites- It's time for a party! These two-bite pie crust appetizers are loaded with a fiesta of flavors including Mango, red onion, jalapeño chile, avocado, and goat cheese. Prep Time: 55 Min

  • Hazelnut-French Silk Turtle Pie - Here's a rich and elegant dessert that is so easy to make. You have a rich flaky crust filled with creamy chocolate and caramel...what more needs to be said? And, with a prep time of only 20 minutes, you can't go wrong. 

  • Caramelized Peach Upside-Down Coffee Cake - Now, you can have the decadent flavor of a Peach Upside -Down Coffee Cake, without spending hours in the kitchen. Made using Pillsbury® sugar cookie dough, this recipe has a prep time of only 30 minutes, but it is sure to dazzle your guests. 


Now, for the Giveaway...

Walmart logo

You can now enter to win a

$25 Walmart gift card 


Once again, I'm using the nifty Rafflecopter widget to make entering faster and easier...

Once the winner is chosen using the Rafflecopter random number generator, they will need to supply me with their mailing information. That information will be forwarded to MyBlogSpark, who will then send your prize.

This contest is open from now until 25 March 2012, 12:01 AM, Eastern Time. Open to US residents only.

Good Luck!

Legal stuff: I hereby attest and affirm I have received a gift card from Walmart. I also disclose and reveal that the gift card, information, and giveaway have been provided by Walmart and General Mills, through MyBlogSpark

20 February 2012

Scrambled Eggs Casserole


photo of the scrambled eggs with bacon, sausage,spinach, and feta cheese

The following is a recipe I came up with to take a different spin on the usual scrambled eggs routine.It includes: scrambled eggs, bacon, sausage, spinach, and feta cheese. I originally came up with this to stuff into the calzones I like to make, but I have since found a variety of ways in which to use it. 
For example, you can:
  • Just eat it from your dish
  • Use it as a casserole (brunch idea)
  • Use it as a stuffing in burrito shells (brunch idea)
  • Use it as a pizza topping (my kid's favorite)
photo of the scrambled eggs with bacon, sausage,spinach, and feta cheese pizza
  • Make calzones (use your favorite pizza dough or make your own. Here's a link to my Pizza Dough Recipe)
  • Try it as a sandwich
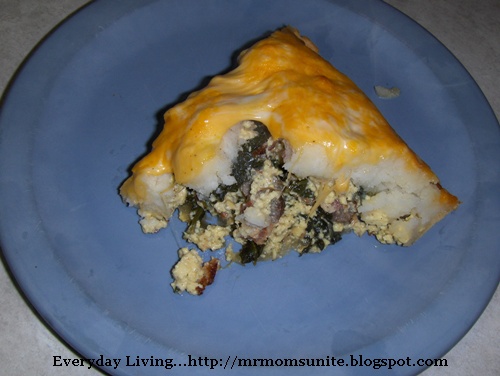
  • Use up pie crust by making it into a pie (I did this as well. I just topped it with mashed potatoes, cheese, and baked)
photo of the scrambled eggs with bacon, sausage,spinach, and feta cheese as a pie

photo of the scrambled eggs with bacon, sausage,spinach, and feta cheese as a pie

As you see, there are several things you can do with this recipe. Since this recipe makes so much, you can experiment with several ideas from just a single batch. Also, once made, this recipe keeps well for several days in the refrigerator. Just remove the portion you want and microwave to heat. Now, onto the recipe...


What you need:
  • 12 Eggs
  • 1 Cup buttermilk (adds a great tang flavor to the eggs)
  • Sausage...use your favorite
  • 6 Slices bacon (or more if you want)
  • 2 Handfuls of fresh baby spinach...(see photo below). You can also just use frozen spinach that has been thawed and drained. It will work just as well and you won't have to cook it :)
  • Feta Cheese...again, a few good handfuls (adjust to suit your taste)
  • Salt...to taste
  • Pepper...to taste
  • Rice wine vinegar...for spinach (Optional, but adds a great taste)
  • Minced garlic...for spinach (optional)
  • 6 Tbsp. Ranch Dressing (optional, but really adds a unique flavor).

Now that we have our ingredients, let's begin. What we will do is cook everything separately and then, once the eggs are cooked, we will combine all the elements together.

Bacon: 
  • Pre-heat oven to 400°
  • Place your bacon on a baking sheet (I line mine with foil, but parchment paper will work as well)
  • Bake your bacon for 10 minutes, turn and then bake an additional 10 minutes (this will give you fairly crispy bacon. If you like yours less crispy, just reduce the bake time
  • Remove and drain on paper towels, crumble, and set aside
Spinach: 
  • Place two generous handfuls of spinach in the frying pan and season with salt and pepper
photo of the spinach uncooked
  • Saute the spinach until cooked and then add some minced garlic (about a teaspoon) and rice wine vinegar
photo of the spinach cooked
  • Drain and set aside
photo of the spinach drained

Sausage:
  •  Place sausage in pan and cook until done
  • Drain and set aside
Eggs:
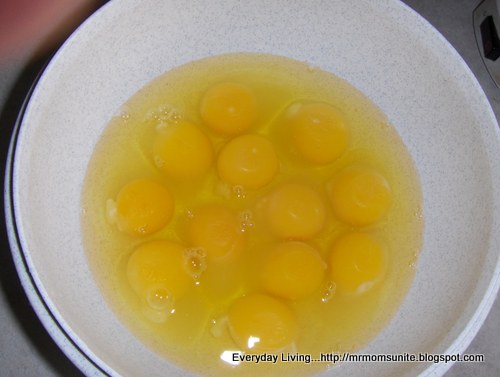
  • Place the eggs in a bowl and, using a whisk or fork, break the yolks and beat until smooth
photo of the eggs
  • Add the buttermilk (1 cup) and mix well
  • Add salt and pepper and mix well
photo of the eggs whisked
  • Add the eggs to frying pan and cook until scrambled to your preferred level of doneness (some people like their scrambled eggs well done and dry, while others prefer them more moist).
  • Drain any extra liquid if needed
Putting it together:
  • With the eggs still in the frying pan, add the spinach and combine well
  • Add the sausage, bacon, and mix well
  • Add the Feta cheese mix well and heat until cheese begins to soften
  • Lastly, add the Ranch dressing, if desired, and mix
photo of the scrambled eggs with bacon, sausage,spinach, and feta cheese
You now have a very versatile dish that can be enjoyed in a variety of different ways. Have fun and try and invent new ways of serving this. If you do, please leave me a comment and I will add your ideas to this article, along with a nice link to your site. :)

27 January 2012

My Pizza Dough Recipe

Here's a copy of the pizza dough recipe I use most every week. I use it not only for making pizzas, but calzones, cheesy bread, and French Bread. A photo follows at the end of the recipe.

What you need:
  • 1 ½ Cups warm water (about 110 degrees)
  • 3-3 ½ Cups flour (amount varies with humidity)
  • 1 ½ tsp. Yeast
  • 1 ½ tsp. Brown sugar
  • 1 tsp. Salt (I use onion salt for more flavor. If you do this, you can omit the onion powder)
  • 1 tsp. Garlic powder
  • 1 tsp. Onion powder
  • 1 tsp. Oregano
Putting it Together:
  • Set your bread machine to the "Mix Dough" setting and then add the brown sugar, water, and yeast. Let proof for about 5 minutes
  • Add 1 cup of flour and then olive oil, salt, garlic powder, onion powder, and oregano
  • Start the machine and add the remaining flour ½ cup at a time. Let the machine incorporate the flour before adding more. Once all flour is added, make sure the dough is not too wet or dry (add flour or extra water as needed)
  • Once the dough cycle is complete (about 1 hour 40 minutes), remove dough and gently roll into a ball
    • OR remove dough from machine after it is finished kneading- about 20 minutes- and place in a large, oiled, bowl. Cover with oiled plastic wrap and place in a warm area until doubled- about 1 hour), then remove dough and gently roll into a ball
  • Let rest for 10 minutes and then you are ready to create your pizza
  • You will have enough dough for 1 very large pizza or 2 smaller ones. Also, you could get 2 smaller pizzas and 2 calzones out of this recipe.
Here are a few ideas for you...

Taco Pizza

How to Make Calzones

My Version of Papa Murphy's Cheesy Bread


Here's a photo of the dough after it's been "de-fluffed" and shaped. This is the photo I used for the Cheesy Bread, so the dough is in a log shape. If you are making two pizzas with this recipe, then the log shape is fine, as it makes it easier to divide. If making one pizza, the dough should be in a ball shape.
photo of dough shaped in log

19 November 2011

Our Thanksgiving Day Menu 2011

Here is a list of the items we will be preparing for Thanksgiving. If you would like the recipes for any of these dishes (Each recipe comes with its own shopping list), please click the link and you will be taken to the appropriate page. If you have any questions on preparing any of the following recipes, please let me know in a comment.

Have a safe and Happy Thanksgiving!


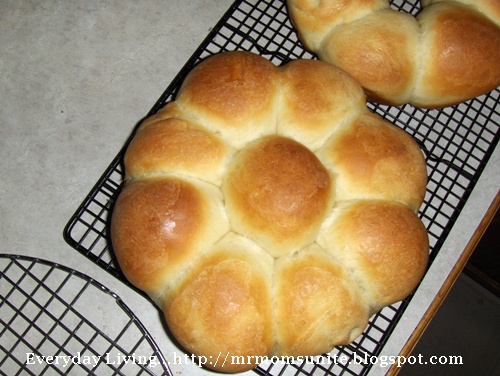
I decided to make rolls this year...

photo of rolls after they have baked

White Dinner Rolls


Appetizers...

photo of cheesy bread

Cheesy Bread


You've got to have potatoes...

photo of whipped potatoes

Whipped Potatoes


How about some gravy to go with those potatoes...

Lump-Free Thanksgiving Gravy


Yes, we are doing stuffing as well. I just sauté celery, onions and add the stuff from the box, so I don't have anything written-up on it.


...And still in his bag, the star of the show...

photo of turkey

Thanksgiving Turkey


Now, for dessert...


photo of cheesecake

Spiced Pumpkin Cheesecake


and finally...

Apple Pie with Crème Fraîche and Black Pepper


Happy Thanksgiving, everyone!!

29 October 2011

Finger Stakes

Before I get started blowing sprinkler lines and assisting in biology and chemistry labs, I needed to make something special for my wife's Halloween party at work. So, I decided that the easiest (Yep, I'm lazy) thing to do, would be to make my Cheesy Bread and try and make them look like fingers.

 What you need:


Putting it together:

  • Make a batch of the garlic sauce
  • When that is made, reserve about 1/4 of the sauce and add 2 Tbsp of red food coloring to it (This will make the sauce appear to look like blood)
  • Make the cheesy bread recipe
  • Once the bread sticks have risen and are ready to have the garlic sauce applied,  cut a slit in the end of each bread stick  and placed one of the olive slices
  • Slather each one with the regular garlic sauce
  • Cover with cheese
  • Using the garlic sauce with the red food dye, paint the end of the bread stick (the one without the olive)
  • Bake at 425° for 12-15 minutes


Here they are before being covered with cheese... 

photo of cheesy bread finger stakes
Ready for the oven... 

photo of cheesy bread finger stakes
Once baked and cooled, I placed a stick (stake) up the middle of each one, which is why I can call them: Finger Stakes :-)

Boxed-up and ready to go...

photo of cheesy bread finger stakes

08 May 2011

My Version of Papa Murphy's Cheesy Bread

As you may know, I am a huge fan of Papa Murphy's Pizza. I believe that they have some of the best pizza around (minus my old favorite Chicago Connection). However, during these tough economic times, it is not always feasible for us to go out and grab one of their take-and-bake pizzas and cheesy breads to enjoy, so I do the next best thing and make my own. So, enough of the blathering and on to the recipe.

photo of baked cheesy bread

What you need...

  • Garlic sauce...1 recipe ( you may not use the entire amount, but it will come close). Also, be sure to make the garlic sauce at least 2+ hours in advance. Here is My Version of Papa Murphy's Garlic Sauce, that you can use
...and for the Pizza Dough
  • Warm water...1 ½ cups (about 110 degrees)
  • Flour...3-3 ½ cups
  • Yeast...2 ½ tsp.
  • Brown sugar... 1 tsp.
  • Salt...1 tsp.(I use onion salt for more flavor. If you do this, you can omit the onion powder)
  • Garlic powder...1 tsp.
  • Onion powder...1 tsp.
  • Oregano...1 tsp.
    Putting it Together
  • Set your bread machine to the "Mix Dough" setting and then add the brown sugar, water, and yeast. Let proof for about 5 minutes
  • Add 1 cup of flour and then olive oil, salt, garlic powder, onion powder, and oregano
  • Start the machine and add the remaining flour ½ cup at a time. Let the machine incorporate the flour before adding more. Once all flour is added, make sure the dough is not too wet or dry (add flour or extra water as needed)
  • Once the dough cycle is complete (about 1 hour 40 minutes), remove dough and gently roll into a ball
    • OR remove dough from machine after it is finished kneading- about 20 minutes- and place in a large, oiled, bowl. Cover with oiled plastic wrap and place in a warm area until doubled- about 1 hour), then remove dough and gently roll into a log-shape

photo of dough shaped in log

  • Using a knife or dough cutter, slice even pieces from the dough (about 10-12 slices)
  • Take each slice, place on counter, and roll out lengthwise into a rope (about 12 inches)

The first tray...
photo of dough shaped in ropes

  • Place 2 inches apart on parchment-covered baking sheet and repeat with each slice
  • Using a pizza cutter, cut each piece in half

photo of dough shaped in ropes and cut

  • Cover with lightly oiled plastic wrap and let rise in warm area for 30 minutes
  • Shred cheeses and mix together
  • Set oven to 425°
  • Once doubled, slather each piece liberally with garlic sauce
  • Cover liberally with cheese

Dough is covered in sauce and cheese is being applied...
photo of dough slathered in sauce and cheese

  • Bake for 12-15 minutes, until lightly browned
  • Enjoy!
These store well in the refrigerator and also freeze very well. To reheat, pop in the microwave on high, for 20 seconds. You might also want to try putting a slice of salami on them.

19 February 2011

My Version of Papa Murphy's Garlic Sauce

I have to admit that I am a very big fan of Papa Murphy's pizza, but I can't always hop in a car and go get one. This being the case, I hunted around for a recipe that I could make at home, yet still tastes very close to the real thing...and by taking a few recipes and tweaking them, I think I found it! This recipe calls for using Ranch Dressing and I found that by making the dressing myself, I can come closer to the actual Papa Murphy's sauce.

Before I get to the recipe, let me tell you that the garlic used in this recipe gives the sauce a bite, but when heated, the flavor mellows very nicely. So, if you use this as a dip, expect a bite. Some other uses are: as a pizza sauce (duh!), cheesy bread, mix it in mashed potatoes, use instead of mayo to add a bite to your sandwich, or put a dab on your steak. Just use your imagination, you won't be sorry.

If you just want to use the ranch dressing portion of this recipe, just omit the minced garlic and the Parmesan cheese.

23 November 2010

Whipped Potatoes


Here's what they look like...

photo of whipped potatoes

This will be the last post on my Thanksgiving menu. I know, that in itself is reason to be thankful. There is the "Great Debate" as to whether to go mashed or whipped. If just making it for my family, I usually just do the mashed potato thing and save myself a little work. But, since this is a special occasion, I like to make things a little more fancy, which is why I choose to do the whipped potatoes. As you look over the ingredients to this recipe, you may raise your eyebrows when you come upon the buttermilk, but this will give your potatoes a nice, tangy flavor. As you can see, this recipe is somewhat large (I have to make enough for 23 people), but you can just scale-down the ingredients to suit your needs.

I hope you all have a very safe and Happy Thanksgiving!


What you will need...

  • Potatoes...10 pounds (1 bag)
  • Butter...½ to 1 stick
  • Salt...to taste
  • Pepper...to taste
  • Buttermilk...½-1 cup
  • Parmesan Cheese...1-2 cups (I know it's a lot, but I love to make it cheesy. You can also substitute the Parmesan for any type of cheese you like
    • measurements are estimates and based upon texture/taste

22 November 2010

Thanksgiving Turkey


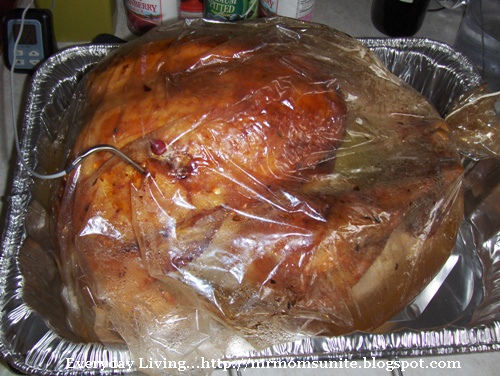
photo of a cooked turkey


I figured that since many of us will be hitting the stores today or tomorrow, I would share my turkey recipe with you today, instead of waiting until tomorrow. The above photo was taken just after the turkey came out of the oven. You can see, that I like to cook it inside a bag. I find that this really helps keep-in the moisture.

I have been making our turkey using this recipe for the past several years. It comes out very moist and the flavoring from the oranges, various herbs, and the onions really boost the flavor. A few years ago, I was lazy and decided not to go to the extra trouble and do all of this. Well, right off the bat, everyone noticed the difference. So, I make it a point to go the extra mile. Oh, and on a positive note, in the many years I have made this, I have never had to drive someone to the ER :)


What you will need...

  • Turkey...any size, we usually get between 20-25 lbs.
  • Turkey bag...used in the baking process
  • Turkey Pan
  • Broiler Pan
  • Meat Thermometer (Example of the kind I use, is at bottom of page)
  • Flour...1 Tbsp
  • Compound Butter...Click here for recipe
  • Oranges...2-3
  • Onions...any leftover from other recipes
  • Celery...any leftover from other recipes
  • Herbs...any leftover from other recipes

21 November 2010

Spinach and Artichoke Stuffing Recipe

I served this bad boy a few years ago and it disappeared within a matter of minutes. Even my two veggie-hating kids liked it. When you first look at this recipe for Spinach and Artichoke Stuffing, it may seem rather complex, but it is actually very easy to put together. The trick is to get everything organized and then just follow the steps. I hope that you will like this as much as my family did. Again, if you run into any problems or have a question, please let me know and I will do my best to help. Oh, you can also put this together the night before and then bake on the big day. Now, here's the recipe...


What you will need...


  • extra-virgin olive oil... ¼ cup

  • spinach...2 ½ pounds , washed (3 cups cooked and roughly chopped)

  • yellow onions...2 cups chopped

  • garlic...1 Tbsp roughly chopped

  • Emeril's Italian Essence (recipe here), or other Italian Seasoning blend...1 Tbsp plus 2 tsp

  • salt...2 ½ tsp

  • black pepper...1 ¼ tsp freshly ground

  • artichoke hearts...3 (8 ½-ounce) cans quartered , any tough outer leaves removed

  • eggs...2 large

  • heavy cream...1 ½ cups

  • chicken stock...2 cups

  • lemon juice...2 Tbsp

  • French bread...12 to 14 cups cubed (1-inch) day-old (1 loaf)

  • Brie...1 pound , rind removed and cut into ½-inch cubes


    • TIP: To make it easier to trim the rind from the Brie, wrap the Brie in foil and place it in the freezer for about an hour. This will firm it up and make rind-extraction much easier

  • Parmesan...½ cup freshly grated

  • parsley leaves...¼ cup minced fresh

20 November 2010

Apple Pie with Creme Fraiche and Black Pepper Recipe

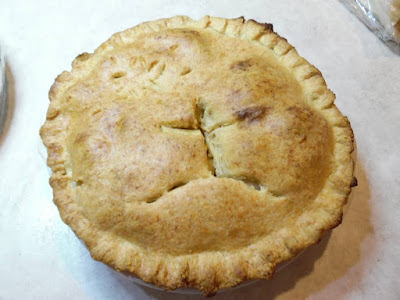
Here is the recipe for the second dessert we will be serving for Thanksgiving. Although not really a traditional pie for the Thanksgiving table, ever since I introduced this more than twelve years ago, Apple Pie with Crème Fraîche and Black Pepper has become a tradition. I found that making this pie a few days before the "Big Event", enhances the flavors (not to mention cuts-down on the last minute preparations).
photo of finished apple pie


This pie also makes a great gift. Prepare as shown, but do not bake. Make a copy of the baking instructions and include that with the pie. I believe that the wonderful aroma of an apple pie baking is also a gift (boy, that sounds sappy, doesn't it?). Anyway, without any further ado, here's the recipe...


What you will need...


  • Pie Crusts... 2

  • Granny Smith Apples... 2 ½ lbs.

  • Sugar... about 3/4 cup plus 1tsp.

  • Fresh Lime Juice... 2 Tbsp

  • Salt... Pinch

  • Black Pepper... ¼ tsp. (freshly ground, if possible)

  • Flour... 4 Tbsp

  • Calvados or Brandy... ¼ Cup

  • Crème Fraîche... ½ cup click here for recipe

  • Milk... about 1 Tbsp

19 November 2010

Spiced Pumpkin Cheesecake Recipe

My wife found this recipe while leafing through a magazine and wanted me to make it for a party she was having at her work. Well, I made it and it was a big success, so "The Boss" decided that we would add it to our Thanksgiving menu. This will be one of two desserts we will be making and I think it will be a great addition to the table.


What you need...


  • Ginger Snaps... About 38. When finely chopped, you should end up with about 1-½ cups

  • Pecans... ¼ cup; finely chopped

  • Butter (unsalted, please)... ¼ cup (which is 4 Tbsp), melted

  • Cream Cheese... 4 pkg. (8 oz. each), softened

  • Sugar... 1 cup

  • Pumpkin... 1 can (15 oz.)

  • Pumpkin pie spice... 1 Tbsp.(bulk recipe at end of page)

  • Vanilla... 1 tsp

  • Eggs... 4

  • 9-inch springform pan

  • Large baking pan that your springform pan can fit into

  • Parchment paper

18 November 2010

White Dinner Rolls


Photo of one pan of rolls after baking (using milk wash)...

photo of rolls after they have baked

Even though I am still working on this recipe (I'm taking several different recipes and trying to take the best from each one), the rolls that result from this recipe are extremely fluffy and soft. Over the past several weeks, I have been making this recipe and then freezing the result. Why? Well, my plan is to make these a few days in advance and then freeze them. On Thanksgiving (to save time), I will nuke them in the microwave and serve. In my test, I froze a batch for one week and then brought them in and let them thaw on the counter. I then nuked one for 10 seconds on high and tried it. The result was a slight depreciation in flavor, but the only reason I noticed it, was because I had tasted them fresh from the oven. You can make these fresh and serve or you can make them and freeze for later. I just wanted to point out that the freezing option is available.

Now, I've bored you enough, so on to the recipe...


What you need...

  • Yeast... 2 ½ tsp
  • Water... ½ cup (temperature roughly 105°)
  • Milk... 1 cup (scalded and then cooled to same temperature as water)
  • Bread flour... 3 ½ - 4 cups (amount will vary depending on humidity)
  • Eggs... 2
  • Butter (unsalted)... 4 Tbsp
  • Honey... 4 Tbsp
  • Salt... 1 - 1 ½ tsp
  • Cake pans or muffin pans if you prefer... 2


Putting it together...

17 November 2010

Making Ricotta Cheese

This is the third and final post that will deal with my Thanksgiving preparations. After this cheese is made, I will have all the custom ingredients needed to begin making my other recipes. This cheese will be used in making the manicotti and, if there is any left over, I may add some to a portion of the whipped potatoes.

Although, the idea of making ricotta cheese may seem intimidating at first, making this cheese is actually very easy. In addition, if you are a family that uses ricotta cheese a great deal, you will find that making it yourself will save you money. Next time you are in the store, price-out the cost for a gallon of milk and a bottle of vinegar (which you can use for several batches of cheese and other things as well) and compare it to the cost of a single container of ricotta cheese. You will be able to see how cost-effective it is to make yourself. As always, if you have any questions, please feel free to let me know and I will do my best to assist you.


What you need

  • One gallon of whole milk
  • Salt (I use Kosher salt)... ¼ - ½ tsp (depends on how salty you like your cheese)
  • White vinegar... 1/3 cup, plus 1 tsp
  • Thermometer
    Here's one like I use... Polder Classic Cooking Thermometer/Timer, Graphite
  • Cheese cloth
  • Large, non-reactive pot
  • Colander

15 November 2010

My Thanksgiving Schedule and Crème Fraîche

Here is the second installment in my getting-ready-for-Thanksgiving posts. Here is a sample schedule that I will be using this year, which will help ease the stress (Yeah, right) of the Holiday:

  • Saturday... Cleaning the kitchen (the worst part of getting ready)

  • Sunday... Make the Crème Fraîche and compound butter

  • Monday... Complete cleaning the kitchen

  • Tuesday... Making the apple pie, pumpkin cheesecake, and the rolls

  • Wednesday... getting the Manicotti ready (will bake on Thanksgiving), get the turkey ready for it's starring role, and generally making sure everything is good to go

  • Thanksgiving... The madness begins

I use the Crème Fraîche (basically a very rich sour cream) in my apple pie (I will share this recipe in the next few days) and any leftovers you may have can be easily used as an additional garnish for your mashed/whipped potatoes. The recipe for the Crème Fraîche is very easy and takes very little preparation, however, it does take 24 hours for it set, so it is best to make the one or two days before you plan on making your apple pie. For example, I usually make the pie on Tuesday, so I will start the Crème Fraîche on Sunday night.

photo of Crème Fraîche
photo courtesy of... artistta.blogspot.com

Crème Fraîche:

Things you'll need:

Heavy Cream...1 cup
Butter Milk...1 Tbsp
jar w/lid...1

13 November 2010

Our Thanksgiving Menu and Making Compound Butter

Wow, a compound title...

Okay, here's our Thanksgiving menu:

  • Dinner Rolls...I'm tweaking the recipe as I write this, so we will see how it turns out. Hey, I actually kept track of the measurements this time

  • Whipped Potatoes...there's a shock

  • Manicotti...Yes, something different and just because I won't have enough to do, I'll be making my own Ricotta cheese to use in it. I am currently trying to find a recipe for this, so if you have one, please let me know. As soon as I have made and tried a successful recipe, I will share it with you

12 October 2010

Harvest Soup

Over the weekend, we were informed that the first frost of the season would be arriving this week (it arrived today), so with this in mind, my wife went and harvested all of our ripe veggies. We had tomatoes, peppers, corn, and another zucchini we inherited, so I figured that the easiest thing to do with them would be to make a soup. With a few purchased items to help balance the flavors, our Harvest Soup was born.

06 October 2010

Focaccia Bread Recipe

Quite a while ago, I shared a focaccia bread recipe that used a sour dough starter, instead of yeast. Although, it tasted fantastic, I realize that many may not have a sour dough starter or just don't want to mess with one. This being the case, here is another focaccia bread recipe that uses yeast. For this particular recipe, you will need to begin it the night before by making a biga. If you follow the link, it will explain how to make this very fast and easy starter. The next day, just take your biga out of the fridge and bring to room temperature. An alternative would be to make the biga just before you go to bed and place it in a warm place; it will be ready and waiting for you the next morning.


What you need...

  • Warm water... 1  1/3 Cups
  • Active dry yeast... 1 tsp.
  • Bread flour (all-purpose will work nicely)... 3 Cups
  • 1 tsp of garlic powder
  • 1 tsp of oregano
  • ½ tsp of basil
  • ½ tps of thyme
  • Salt... 1 ½ tsp.
  • Biga... all of it (at room temperature)
  • Big bowl... (this dough is going to rise as much as 3-times its size)
  • Bowl scraper
  • Plastic wrap
  • Parchment Paper
  • Baking pan (9 x 13)... 1
  • Oil... for coating the bowl and plastic wrap
  • Spray bottle filled with water...set on mist

Related Posts Plugin for WordPress, Blogger...

Google Analytics